Stampin' Up! Independent Demonstrator ~ Debbie Dutchess ~ www.debbied.stampinup.net ~ debbiedutchess59@gmail.com

Thursday, December 16, 2010

Filled With Love

Are you ready to start thinking about Valentine's Day? I know, Christmas isn't even here yet, but just take a minute, so you don't miss this great promotion. Valentine's Day is the second highest card-giving holiday next to Christmas, and Stampin' Up! has a new promotion for us!
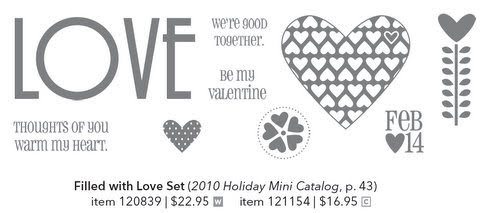
Starting tomorrow, from December 17, 2010, through January 24, 2011, receive a FREE package of Bitty Buttons (a $4.95 value) when you purchase the Stampin' Up! Filled with Love Bundle. Purchase the Bundle & Take my January Class for FREE!

The Filled with Love Bundle contains the Filled with Love Stamp Set in your choice of Wood-Mount or Clear-Mount Stamps, the Exclusive Love Patterns Designer Series Paper Pack, and a Free package of Bitty Buttons! These cute little buttons are a great addition to the bundle. There are so many cute things you can make using them!


To order the Filled With Love Valentine's Bundle or any other products, please visit my online store HERE.
Or Contact me. We will be using your New Bundle to make Valentine Cards & gift items in my class on January 16th. Get your Bundle & Sign up for Class Today!

Thanks for stopping by!
dd

Monday, December 13, 2010

Birthday Bash

That's what my class was yesterday ~ a Birthday Bash! We made 12 Birthday Cards getting a head start on the New Year! Those January Birthdays always tend to sneak up on me, so I decided to be ready for them this year. I designed 4 cards & we made 3 each of the 4 designs.

The first one is pretty much a CASE from the catalog. I've had my eye on the For You Flower Stamp since the catalog came out & finally got it. I don't know why it took me so long. It's one of the single stamps that you can get for only $7.95.

It coordinates with the Fancy Flower Punch & the 1-1/4" Circle Punch. I've also used the 1-3/8" Circle Punch to add a layer of Chocolate Chip. I stamped the flower once with Real Red Classic Ink, and once with Crumb Cake Classic Ink. On the Crumb Cake flower, I used my Real Red & Chocolate Chip Stampin' Write Markers to color in the heart and the words You & for before stamping and punching them out.

The patterned paper is from the Play Date DSP, edged with Chocolate Chip Cardstock trimmed with the Scalloped Edge Border Punch.

I had a little Holiday Boutique in my home this past weekend, hence my absence ~ I can't believe it's been so long since I've posted anything! I have some pictures to share tomorrow.

Thanks for checking in!
dd

Monday, December 6, 2010

Send Me Your Wish List

Tired of getting small appliances, goofy gadgets and fuzzy slippers for Christmas when what you really want is a BIG SHOT or some stamp pads?

You know your hubby and other family members think you're from another planet when you start using words like DSP & Versamark! So here’s your chance to get what you want!

Send me your Wish List!

  • Email me at deeleed@aol.com a list of the things you'd really love to receive this Christmas. It's a Wish List, not an ORDER. You can include Gift Certificates for Classes or Products on your list.
  • Include your name & address and a list of people that you would like to receive your Wish List. I will need their emails as well ~ no worries ~ I won't harass them about Stampin' Up!
  • I will contact your gift-givers with a friendly email letting them know You are my customer and that these are things that you have mentioned to me.
  • I am offering Free shipping & Free gift wrapping (if desired) to anyone taking advantage of shopping from your Wish List. I will also include an extra little stamping goody with your gift.
  • Orders must be placed by December 13 to guarantee delivery for Christmas.
  • Shoppers can also visit my website: www.debbied.stampinup.net and make their purchases online, although I cannot offer free shipping, gift wrapping or the free gift.
Thanks for stopping by! Get those Wish Lists filled out today~
dd

Monday, November 22, 2010

Online Spectacular!

Get out your Holiday Wish Lists! Stampin' Up! has an awesome offer for you this week!

In addition to offering the Starter Kit at 50% off, now they have announced a one-week Online Spectacular Event where you can purchase select items for 20% to 50% off!

That's not all! You'll receive FREE SHIPPING for any online order over $150. Remember, those orders also qualify for Hostess Benefits! Now that is Spectacular!

There are dozens of items on sale now through November 30. You'll find everything from Rhinestone Brads and Stamp & Accessory Bundles, to Big Shot Dies and Designer Fabrics. You can even purchase the My Digital Studio Papercrafting Software for 50% off!

What an awesome way to start the holiday shopping season!

Now, if you're not interested in ordering online, just email me your order by noon Saturday, November 27 to qualify for these amazing discounts. I will offer *FREE SHIPPING ON ALL ORDERS I receive during this promotion ~ that's more instant savings for you!

This is just one more reason I Love being a Stampin' Up! Demonstrator!

Thanks for stopping by!

dd

*This is my own personal offer & is not sponsored by Stampin' Up!

Monday, November 15, 2010

Mini Lunch Sack Characters

We had another awesome class yesterday! The ladies loved the characters we created using the Mini Lunch Sacks from the Holiday Mini Catalog. I had gone to a crop in August, and we collectively created the Turkey and the Scarecrow. I then used them as a guide and created the Snowman and Santa. I think they are so adorable! I can't wait to see what I can come up with for Valentine's Day, Easter, etc.


We used lots of Punches, the Big Shot, Embossing Folders & Texturz Plates, Sponging, Stampin' Dimensionals & Sponge Daubers, Ribbon & the White Signo Gel Pen for highlights.

If you like what we did in this class, be sure to sign up for December. Don't let those January Birthdays sneak up on you. Take a day from your busy schedule & get a head start on your Birthday Cards for 2011. Sign up for this class today & check those cards off your to do list.

If you've ever considered becoming a Stampin' Up! Demonstrator, now is the perfect time! Now through November 30 you can join & get your Starter Kit for half price. That's right ~ for only $87.50 you can get all the products & business supplies you need to get you started! You can choose either the Standard or the Digital + Starter Kit. That's over $310 worth of paper or digital crafting and business supplies for only $87.50! Contact me if you'd like to join my Team.

Thanks for checking in ~ Have a crafty week!
dd

Thursday, November 11, 2010

Never-Before-Seen Offer

Would you like to do what I do? Have you been thinking about becoming a Stampin' Up! Demonstrator? Well, you don't have to think any longer. Starting November 15, and lasting until November 30, 2010, you can purchase the Standard or Digital + Starter Kits for only $87.50--that is 50% off the regular price of $175 for over $310 worth of paper or digital crafting and business supplies!
Just imagine yourself receiving that box, just in time for the Holidays! You'll have all you need for your holiday cardmaking, great decorations & it's just fun to have new 'toys'! If you choose the Digital Kit, you can get a jump start on your Holiday pages for your scrapbook.

You can enjoy all this and earn additional income while sharing your creativity, making new and lasting friendships, enjoying access to nearly unlimited creative ideas and receive a free subscription to an exclusive monthly magazine. You also have the opportunity to earn free products and incentive trips. All new Demonstrators receive 2 free months subscription to your own Business Website. So what are you waiting for?

This promotion only lasts for two weeks, so don't wait too long. Contact me now to join my Team!

Thanks for stopping by!
dd

Monday, November 8, 2010

Shower Favor & Card

We had my nieces Bridal Shower yesterday. My contribution was making the favors for everyone who attended. Thanks to my Upline, Cindy K. I had the perfect idea.

I made 30 of these adorable "purses", perfect for my niece, who has loved little bags since she was little herself. The colors for her wedding are white, cream, silver & purple. The Lap of Luxury DSP was perfect, paired with Concord Crush Cardstock and the 1/2" Stitched-Poly Ribbon. Doing a project like this is when you fall in love with the Big Shot all over again! I was able to cut 2 layers of cardstock at a time, and 4 layers of DSP. Since I had to cut 90 Scallop Circles, that made my job so much easier.

I also made the card I put with her gift. The sentiment is from Whimsical Words from Sale-a-Bration last year. I love this set and found a great saying that I hand wrote on the inside with my Concord Crush Stampin' Write Marker.


Thanks for stopping by ~ Have a great week!
dd

Tuesday, November 2, 2010

Merry Little Christmas

Hope you all had a Haunting Halloween. We don't get any trick or treaters where I live, but I still buy candy, just in case. Now, I can't seem to keep my hands out of the candy basket! I guess I need to get busy stamping to keep my hands busy and my mind off of the chocolate.

Here is another card from my Christmas Card Stamp-a-Stack. For this one I used the Builder Wheels, Little Cardinals & Little Christmas. The Builder Wheels are so much fun because you can design your own wheel. Using the Jumbo Handle and 2 or 3 of the Builder Wheels you can create just the look you want. You can also customize your colors by using the Jumbo Uninked Cartridge, or for more color you can use the Uninked Triple Cell Cartridge. These are designed so you can use 3 different colors at one time. I used a Jumbo Cartridge and my Garden Green Classic Ink Refill to ink it up. I wheeled the image on a whole sheet of Whisper White Cardstock, and then cut it into strips the size I needed.

The snowflake printed paper is one of the cute designs from the Candy Cane Christmas DSP. The background is Baja Breeze, run through the Big Shot in the Perfect Polka Dot Embossing Folder. The embossing folders are an easy way to add dimension to any project. I added a strip of Always Artichoke Seam Binding, punched out one of the cardinals with the 1" Circle Punch and adhered it with Stampin' Dimensionals.

I wanted to add just a touch of color, so I used my Blender Pen with Poppy Parade, Real Red & Garden Green Classic Ink to color the little cardinal.

My next class is coming up in a couple of weeks, November 14. We will be decorating the Mini Lunch Sacks from the Holiday Mini Catalog. We'll be making a Scarecrow, Turkey, Santa & a Snowman. Are you hosting a Holiday Event, or just want to take a Thank You to your hostess? Then you won't want to miss this class. Contact me to sign up today!

Thanks for checking in!
dd

Thursday, October 28, 2010

Peace on Earth

Here's another card from my Stamp-a-Stack class. This one is pretty simple, but I like it. I used the traditional colors of Garden Green and Real Red.

The background is embossed with the Big Shot and the Square Lattice Embossing Folder. Then I punched out a circle with the new 2-1/2" Circle Punch. Rather than trying to center the sentiment, from the Hostess Set in the Holiday Mini Catalog, Peaceful Season, I stamped it in Real Red Classic Ink on a square of Very Vanilla Cardstock and centered it underneath before adhering the green to the base. That way I could make sure it was centered and nice & straight.

The ribbon is the Real Red 5/8" Satin with the Real Red 1/8" Taffeta layered on top. The button is from the Candy Cane Big Designer Buttons assortment. I love these! They come in 2 different assortments with 4 each of 3 different designs in 4 colors. They are 3/4" and 1" in diameter, and coordinate with the Designer Series Paper and Fabric. They can be found in the Holiday Mini Catalog on page 17.

If you've started thinking about decorating for the Holidays, you'll definitely want to join me for my next class. We will be making 4 Mini Lunch Sack designs, perfect for filling with goodies or using as part of your holiday decor. Come create a Scarecrow, Turkey, Santa & a Snowman. These are so cute & easy, you'll want to make one for everyone that will be sitting around your holiday table!

You can find information about all of my classes on my website. Want to visit me? Just click HERE.

Thanks for checking in ~ have a great day!

dd

Wednesday, October 27, 2010

#3 Grand Daughter & Card

Wow ~ What a weekend! I got a call from my daughter at 1:00am Thursday telling me she was on her way to the hospital to deliver her baby. We all arrived there at the same time, went in, got her admitted & settled in to her room. Things were going along fine, but when they gave her some pain medication, everything slowed down. We walked the halls for hours, trying to get things moving again and when her doctor came in at 8:00am he decided to send her home. She was still having consistent contractions, but everything else wasn't progressing. She was not happy. I was trying to be positive and told her at least she could get something to eat, and maybe get some rest since she hadn't slept any through the night. Long story short, we were back at the hospital by noon and Lil' Miss Laney Brailyn was born at 5:14am Friday.

I thought this cute pink Christmas Card would be appropriate for today. I saw a card like this on some one's blog & I can't remember now who. This is the Jolly Bingo Bits Stamp Set and Candy Cane Christmas DSP found in the Holiday Mini Catalog. The base of the card is Blushing Bride, from the new In-Colors. I stamped the images in Real Red, Garden Green, Baja Breeze and Soft Suede Classic Ink. I punched them out with the 1" Circle Punch and used Stampin' Dimensionals to pop them up. The Happy Holidays stamp is from the Many Merry Messages Stamp Set. I scalloped one side of the Real Red Cardstock using the Scallop Trim Border Punch. This would be a great card to mass produce. It's fairly simple, but very cute.

If you're designing your Christmas Cards check out the Holiday Bundles! There are several different bundles containing gorgeous products perfect for creating cards, gift packaging and gifts ~ all at 20% off!

Thanks for stopping by ~ I need to go snuggle a little baby girl!

dd

Wednesday, October 20, 2010

Stamp-a-Stack Card #2

Here is another card we made in my class. Another idea I altered from the Holiday Mini Catalog.

I used the Northern Flurry Embossing Folder on Baja Breeze Cardstock for the base of this card, and then randomly stamped the snowflakes from the Jolly Old Saint Nick Stamp Set in Baja Breeze Classic Ink. I stamped the cute little snowman from the same set on a tag from the Two Tags Die, cut with the Big Shot, added Kraft Taffeta Ribbon (discontinued) and adhered it to the card with Stampin' Dimensionals. I tied a bit a ribbon through the Big Designer Button and added it to the tag. The sentiment is also from the Jolly Old Saint Nick Stamp Set. It is stamped in Cherry Cobbler Classic Ink, my new favorite red. It is so rich and yummy! Then I punched it out with the Scallop Oval Punch and layered it on an Extra Large Cherry Cobbler Oval.

Be sure to check back tomorrow for another card from my class. Thanks for stopping by today!

dd

Tuesday, October 19, 2010

Handmade Holiday

We had so much fun at my Christmas Card Stamp-a-Stack on Sunday. I am very pleased with the cards that we made. I tried to keep them simple, but that's not so easy with beautiful DSP, large designer buttons that match, glimmer brads, new punches, and let's not forget the adorable stamp sets! I created 6 cards, and the ladies made 4 each of each design. I just couldn't stop, so they also got 2 Bonus cards that they made 1 each. They went home with 26 cards! They now have a great start on their Holiday Card List.

Most of the cards featured products from the Holiday Mini Catalog, but I did pull in a couple of old favorites. The first card was actually CASE'd from the mini. I just changed the colors up a bit and added a Glimmer Brad, and a different sentiment.

The base is Real Red Cardstock. The scallop square was cut with my Big Shot and the new Scallop Square Duo Die. This die has two scallop squares, this one and one that will layer with the Scallop Square Punch. The polka dot paper is from the incredibly cute, Candy Cane Christmas Designer Series Paper. This paper is just too fun, with red glitter on two of the designs. It also coordinates with the Candy Cane Christmas Fabric and the Candy Countdown Calendar, also in the mini. The Garden Green design behind the ornament is the new Extra-Large Decorative Label Punch ~ Love this punch! The ornament is from the Tags til Christmas Stamp Set, stamped with Real Red Classic Ink, and punched out with the Ornament Punch. I added the Green Glimmer Brad in the center and used Stampin' Dimensionals. The sentiment is from the Word Play Stamp Set.

You can create the perfect Handmade Holiday now at 20% off! From October 19 – December 16, choose from several different holiday bundles containing gorgeous Stampin’ Up! projects – prefect for creating cards, gift packaging, and gifts – and all at 20% off!

Stamp_Set_Bundles_US[1]-1

Contact me or check it out online!
Thanks for stopping by~

dd

Thursday, October 14, 2010

Decor Elements

I haven't done a lot with the Decor Elements, but when I was shopping and saw this plate with the "lace" edge, I knew exactly what I wanted to do.

This is the Small Chocolate Medallion Decor Element. It looks like it was made for this plate. The ribbon is actually Chocolate Chip 1-1/4" Stripe Grosgrain, all I had at the time. It is now discontinued, but we do have it in the new Early Espresso which is a nice darker rich brown that would look really great with this project too.

You can see the entire Definitely Decorative line by clicking on the picture of the catalog on the sidebar. There are so many fun & exciting things to decorate with!

Just a reminder to check out the Clearance Rack. There are tons of items that have been marked down, some as much as 80%! There's only a few more days to take advantage of these great prices.

Thanks for visiting today!

dd

Tuesday, October 12, 2010

Fall Centerpiece

I have been stamping & cutting cardstock like crazy getting ready for my Christmas Card Stamp-a-Stack this Sunday, but yesterday, my floral design skills took over. I had an idea that I'd been wanting to try and decided to take a little break. I was a floral designer for JoAnn's for several years. I worked at one of the first etc. Stores as the Floral Department Specialist. Flowers and stamping are my passions. I don't do as much floral work now, but once in a while I just have to get my glue gun & wire cutters out.

I wanted to make something to coordinate with my candlesticks that I decorated. This is a wooden pumpkin that I had in my fall decorations. I simply added some fall flowers, berries & twigs. Normally when doing a floral arrangement, I would just use silk leaves, but I wanted to make this a Stampin' Up! project, so I cut some leaves with my Big Shot and the Leaves #2 Die, texturized some of them with the Square Lattice Embossing Folder and some of them with one of the Texture Plates from Kit #4.

I love the way it turned out and can't wait to put this on my Thanksgiving table.
Here is a close up of some of the leaves~


Here is a better picture of just the pumpkin. It was hard to get a good picture.


Back to preparing for my class. Hope you're having a great week. Thanks for stopping by!

dd

Tuesday, October 5, 2010

Clearance Rack Blitz

If you haven't checked it out yet, now would be a great time to browse the Clearance Rack . It is a great place to discover discontinued Stampin’ Up! merchandise for fantastic prices. Now, from October 5–18, Stampin' Up! is adding over two hundred more discontinued items--some at up to 80% off to help make room in the Distribution Center for new products! Click on over ~ there just might be something you've been looking for.

I'll be back later to share a project with you~

dd

Monday, September 27, 2010

Feeling Like Fall

What a difference a couple of days makes! Just last week it was a sweltering 95 degrees and today it's only 60. I love the changes of the seasons, and I think Fall is my most favorite. The cooler sweatshirt weather & those beautiful fall colors. I'm not sure we're going to get to enjoy a lot of color here. It's been so dry, I'm afraid all of the leaves are just going to fall off the trees. So here's a card with fall leaves just in case.

This is the Embedding Cardstock Technique. It's a great technique and so easy to do. I just cut my leaves with my Big Shot & the Leaves #2 Die with Cajun Craze, More Mustard & Early Espresso Cardstock, adhered them to Old Olive Cardstock, and then ran them through the BS again in the Square Lattice Embossing Folder. The leaves appear to be "embedded" into the cardstock.

Another fun technique I used is Elongating Punches. I just made that term up. The saying I wanted to use was too long to fit on any of the punches, so I created one. This is hard to explain, so I have a picture to show you what I did.

I cut a strip of paper the width of the Modern Label Punch, and instead of punching it normally, I put the paper up through one end of the punch and punched. Then I put the other end up through and extended it the length that I needed to get my saying to fit and punched. I hope you can tell by my picture what I'm trying to describe. I added a Cajun Craze Brad & Linen Thread and used Stampin' Dimensionals to adhere the saying on top of the Early Espresso 1/8" Taffeta Ribbon.

Don't forget, if you're thinking about joining my Team, now through October 18 when you become a Demonstrator you will receive a FREE craft tote (valued at $39.95) with the purchase of your Starter Kit. This is the beautiful Greenhouse Gala pattern with lots of pockets that will hold your 12" paper cutter, cardstock & craft keepers and it even comes with a shoulder strap.

My next class is October 17. We will be doing a Stamp-a-Stack of Christmas cards. Check my website for more details.

Thanks for stopping by!

dd

Friday, September 24, 2010

More Halloween Fun!

I thought I was done with Halloween, until I saw this project sheet at a local craft store. I knew I had to make these using Stampin' Up! products. Aren't they adorable? They were also perfect for the CCMC118 ~ Create With Connie and Mary Theme Challenge ~ Anything But a Card.

I used several stamp sets for this project. There's Batty for You, Wicked Cool, Got Treats, Aviary and Grateful Greetings.

The little owl is from Aviary. The pumpkin and the words Got Treats is actually one stamp from the Got Treats set. I stamped it, and then just punched the pumpkin out with the 1-1/4" Circle Punch, and the words out with the Word Window Punch. The Trick or Treat saying is from Grateful Greetings. The bat was made using the new Bat Punch, the perfect way to add just a little spooky touch. I love how you can layer the spider web behind the word Spooky from Wicked Cool, and the cute little Frankenstein is from Batty for You.

You could add wallet size photos of your little spooks on the wires for an adorable Halloween display. I'm already thinking of what I can do for Thanksgiving & Christmas!

Thanks for visiting today ~ Have a Great weekend!
dd

Monday, September 20, 2010

Halloween Hoopla

We had another Super Fun class again yesterday, in spite of my forgetfulness. We made several great projects for Halloween & had a lot of fun in the process. I did my class at a local hotel where we get together to crop once a month. Our crop just happened to be scheduled on the same day as my class, so I agreed to do the class there. The room is great. There's lots of tables and space to spread out. The only down fall is that not being in my home, if I forget something I can't just run to my Craft Room & grab it. I thought I was so organized & had everything laid out and ready to go. I think it was the first card that I realized that I had forgotten a punch. We improvised and it turned out fine. Then another punch ~ we improvised again. Then, a third punch! I was embarrassed, but my ladies are so easy going & very creative, it didn't bother them in the least. They loved their projects and now they are set to make their cards & treats for
Halloween.

Here's a picture of all the projects we made:


My next class is a Stamp-a-Stack of Christmas Cards. I will be doing this one at home, so I won't have the fear of forgetting anything!

Thanks for stopping by ~ Have a great week!

dd

Thursday, September 16, 2010

Life is a Matter of Moments

Oh my goodness! I can't believe it's mid September already. The last couple of weeks have been a whirlwind. Among all the madness, I did get to take a long relaxing weekend trip with my hubby to Marco Island Florida to celebrate our 35th Anniversary. It's actually not until next month, but we are expecting our third grandchild on our actual anniversary date, so we decided to take our trip early so we wouldn't take a chance of missing welcoming her into the world. Here's a picture of one of the beautiful sunsets that we enjoyed on Marco.

I thought this card was appropriate for today. I got this card in a swap and have made it again several times. Life is a matter of moments. Moments that pass by so quickly sometimes, we need to try to slow down a bit to enjoy each & every one of them.

This is the Elements of Style Stamp Set. I do love this set. It is so elegant, and is beautiful when water colored, or just as beautiful left alone, as I've done here. I also love the technique of Faux Mosaic. It adds just a subtle touch of texture to the background. All you do is score every 1/2" horizontally and vertically creating the mosaic tile look before you stamp your image. The bird was stamped with Rich Razzleberry & hand cut, then adhered to the card with Stampin' Dimensionals. The base of the card and ink are Soft Suede.

The Holiday Mini Catalog sales period began September 1. There are so many great new products in it, you'll definitely want to check it out. If you need a copy, let me know and I'll get one to you right away. You can also look at it online. Don't forget, you can also order online, anytime!

If you are local, I will be teaching my Halloween Hoopla Class at the Comfort Inn Suites Hotel this Sunday, September 19. There's still room ~ contact me if you'd like to join us!

Thanks for stopping by today!

dd

Thursday, September 2, 2010

New Month, New Stuff, New Special!

Oh ~ where to start? You can now order from the Holiday Mini Catalog. There are so many fun new products in this mini, it's a good thing we have until January 3, 2010 to get them all! If you haven't seen it, click on the picture and take a look. There's Halloween, Thanksgiving, Christmas and even Valentine's Day. You can get all your cardmaking & scrapbook projects prepared and ready to go for the next several months. Or, I bet you have crafty friends that would love to receive some new Stampin' Up! products in their Christmas stockings.

I promised I would share the cards from my last class, so here's the first one. I got a card similar to this in a swap & revamped it a bit for class. I try to use different color combinations, and one tool that is extremely helpful is my Color Coach. It is a swatch of each color of cardstock and has a guide on the back with the coordinating colors. If you find putting colors together a challenge, this tool is a must. You can check it out in the catalog. Sometimes I still do my own thing, just using it as a guide.

I've used Crumb Cake, Marina Mist, Cajun Craze and Very Vanilla. The Marina Mist is embossed using the Big Shot and the Finial Press Embossing Folder. I love these folders, they make your embossing very crisp & clean. The little tabs are the Small Oval Punch, just folded over and attached with a Crumb Cake Brad from the Neutrals Collection. The friends stamp is from Vintage Vogue, and the sentiment is from the Grateful Greetings stamp set. The ribbon is Marina Mist Taffeta.

We have a fabulous incentive this month if you're thinking about becoming a Stampin' Up! Demonstrator! September 1 through October 18, you will get this gorgeous Craft Tote FREE when you join Stampin' Up! as a Demonstrator. That's a $39.95 Value. This tote is patterned after the Greenhouse Gala Designer Series Paper and is large enough to hold your 12" Paper Trimmer and 12x12 Paper. It also has lots of pockets to hold punches, ink pads, markers, and lots of other tools and accessories to help keep you organized while you travel to do your workshops! I'd Love to have you join my Team, and I'd Love to see you carrying this adorable tote!
Contact me if you have any questions, or if you need a copy of the Holiday Mini Catalog. Check my website for my classes, they are posted for the rest of the year. I hope you're having a great week. Thanks for checking in! Oh ~ I have been released from physical therapy & I'm almost back to 100% mobility with my shoulder. Thanks for all the well wishes ~ You're the Best!

dd

Monday, August 30, 2010

Almost Fall

Yesterday was an awesome day! I haven't had a class in quite a while and it was so good to finally be teaching again. I have several cards to share with you, but today I wanted to share my fall display. I'm really in the fall mood, even though the temperatures here are still in the mid 90's. I know it won't be long until we have some cooler temps & the leaves begin to change. It's my favorite time of year, I love the rich, warm colors.

I cut my leaves with my Big Shot and the Leaves #2 Die from Cajun Craze, More Mustard and Pumpkin Pie Cardstock. Then, I texturized them by running them through the Big Shot again in the Square Lattice Embossing Folder. I was going to tie them on to my candle sticks with the Hemp Twine, but the candles came with this really neat twine, so I used it. I love the way they turned out. I'll just change the candles and add a different design on the candle sticks for Christmas!

I've posted the dates for my classes for the rest of the year on my website. You have two opportunities each month to attend. I'll be teaching each class on a Friday night and a Sunday afternoon. September's Class location has been moved to the Comfort Inn Suites. Check my website for details.

Are you thinking about becoming a Stampin' Up! Demonstrator? Check in tomorrow to see what the special is when you sign up in September ~ it's awesome!

Thanks for stopping by!
Have a great day~
dd

Thursday, August 19, 2010

Word Play

This is one of those cards that actually came together just as I had planned. That doesn't really happen that often for me. I usually have some sort of idea that winds up totally different when I'm done creating the card.

This is the Word Play Stamp Set, an awesome set, not only because I earned it free, but because it is a set of 12 great sentiments! They are each unique in their own way. Each one has a different font style & theme, and some have fun characters or shapes, like the arrow in this one. Another favorite in the new catalog is all of the Designer Series Papers. This is the Newsprint DSP. All of the patterns are Basic Black and Very Vanilla. This is a great combination, because you can pair it with pretty much any other color! I've used Cherry Cobbler. This new Core Color is as yummy as it sounds. I love the deep richness of this red, it's going to be great for Christmas and Valentine's Day.

I used the Scallop Trim Border Punch, the 1-inch Circle Punch, and a sneak peek from the Holiday Mini Catalog, a new Medium Oval Punch. I just love that little oval. It was just perfect for punching out the treble clef for this card! The ribbon is the 1/4" Black Grosgrain Ribbon.

I have posted my classes on my website for the rest of the year! Trying to plan ahead & be organized. I'm looking forward to Halloween Hoopla, Crazy for Christmas Cards, Design in 3D, and Birthday Card Bash. Check them out! Sign up for one or all, I'd love to see you here!

There is still time to earn Extra Hostess Merchandise! Host a qualifying Workshop by August 31 to earn $25 Extra Hostess Merchandise. Call me to book your workshop today!

If you would like to learn more about becoming a Stampin' Up! Demonstrator and earning Free stamp sets like I did, call me, visit my website, or email me. I'd love to chat with you!

Hope you're having a great day ~ thanks for stopping by!
dd

Tuesday, August 10, 2010

Back to Stampin'!

First of all, I want to say "Thank You!" to all of you who wished me well with my shoulder issues. I'm still going to physical therapy, but my mobility has definitely improved & I'm on the road to a full recovery.

My card today is pretty simple, but I think it turned out really cute. I had seen a similar card and used that idea to create my own. This is the Play Date DSP. I love the bright colors and adorable designs. The strips were punched from Old Olive, Daffodil Delight and Early Espresso Cardstock, with the Dotted Scallop Ribbon Border Punch. This is a great punch. If you don't have actual ribbon to match your paper, you can create your own. The little owl is from the Forest Friends Stamp Set, another favorite, and the sentiment is from Teeny Tiny Wishes.

Don't forget, that through the end of August, if you host a workshop totaling $350, before tax and shipping, you will receive an Additional $25 in FREE Hostess Merchandise! Online orders do not qualify. You can use your extra $25 on any regular catalog or mini catalog items. Contact me today to book your workshop!

It's great to be back ~ Thanks for stopping by!

dd

Wednesday, July 28, 2010

Shoulder Surgery

Today I'm having shoulder surgery. Hopefully I'll only be down for a couple of days. I was going to try to get a couple of things ready to post in my absence, but I had too many other things to do. I've been having problems for several months, and I'm anxious to finally get this taken care of. Wish me luck & I'll be back very soon!

Thanks for visiting ~ Have a Great day!

dd

Tuesday, July 27, 2010

Extra Hostess Bonus - Book A Workshop Today!

Dates: July 27 ~ August 31, 2010

Details: Hostesses will receive an additional $25 in Hostess Free Merchandise Dollars when they
hold a Workshop totaling $350 or more!

Things to Remember:

  • Only customer, hostess, and workshop order types qualify for this promotion. Online orders do not qualify.
  • Orders must be $350 or more to qualify.
  • Hostesses may use their additional $25 in hostess free merchandise on any regular catalog/mini catalog merchandise.
  • Orders larger than $350 are not eligible for additional hostess free merchandise dollars. For example, a $700 workshop does not receive $50 in additional dollars. All orders over $350 always receive $25 in additional free hostess dollars.
Contact me today to book your workshop!

dd

Monday, July 26, 2010

Mostly Vintage

Today's card was created using a technique that I've been wanting to try for while; Emboss Resist. I used the Decor Stencil, Mostly Vintage, one of those items I bought, but hadn't used yet. I'm trying to be better about that.

Lay the stencil on your cardstock, I used Whisper White. Using a Sponge Dauber, sponge Versa Mark Ink over the stencil. Lift the stencil off, add Clear Embossing Powder and heat emboss. I used a mild soap & water to clean my stencil, and laid it flat on a towel to dry.

Now for the fun part. I used my Log Cabin Smooch Spritz and spritzed the entire piece of embossed cardstock. Set that aside to dry, or you can use your Heat Tool to speed that process up a bit. But, you want to make sure the spritz is completely dry before you take a tissue and wipe off the embossed design. The spritz won't dry on the embossed area and wipes off easily. Don't rub too hard, you want to retain the spritzed look on the cardstock. Now you're ready to finish your card.

Other products used for this card were the Elements of Style Stamp Set for the sentiment. The Big Shot and the Matchbox Die were used for the label. I then adhered that to Early Espresso Cardstock and hand cut the mat behind it. The Boho Blossom Punch was used for the flower along with a Circle Fire Rhinestone Brad for the center. The Scallop Trim Border Punch creates a Pink Pirouette border along the bottom and the Chantilly Crochet Trim adds the perfect Vintage finishing touch.

Stampin' Up! Convention was this past week, unfortunately I was unable to go this year. It is going to be a priority on my list for next year. I have seen just a few updates about the happenings this year and I know they had a blast! I can't wait to hear everything that they learned while they were there. I will update you as soon as I can.

There's only a few more days to rejoin SU for only $35. If you are a former Demonstrator and you want to come back ~ Now is the time! Contact me for more information, or go to my website to check it out.

Thanks for stopping by today!

Friday, July 23, 2010

Just For You

I had so much fun playing yesterday. This is the first card that I made. I love these bright summery colors! Real Red, Pumpkin Pie, Daffodil Delight & Crumb Cake, on a Whisper White base.

The background is the Perfect Polka Dot Embossing Folder. I love texture, and this is a great way to add some if you don't have textured paper. I also added a bit of texture to the center of the flower by using the Square Lattice Embossing Folder. I just ran a little scrap through my Big Shot & then punched it out with the 3/4" Circle Punch. This is a great way to use up some of those scraps too!

The flowers are from the Printed Petals Stamp Set. I hand cut them and used Stampin' Dimensionals to pop them up. The sentiment is from Just Believe, one of the sets that I earned free during Sale-a-Bration. Just one of the perks of being a Demonstrator; Free Stuff! Then, I played a little with the Eyelet Border Punch. I punched a strip and ran it over my Bone Folder several times to soften it up. Then I pleated it to give it the look of fabric eyelet. I think it turned out pretty cute.

Here is a close up of the detail.


Hope you all have a Great weekend ~

dd

Thursday, July 22, 2010

Happy Birthday to Me!

Yep, today is my Birthday, so I decided instead of filling nail holes, sanding & painting in the spare bedroom, I would sneak next door to my craft room and do some stamping. Sounds like a lot more fun doesn't it!

Here is one of the cards that I made. I used the Blueberry Crisp DSP again with coordinating Pacific Point, Marina Mist and Very Vanilla Cardstock. There's not a lot of stamping on this card, but I did use the Itty Bitty Bits for the centers of my flowers.

I'm always thinking about different themes for classes, and I recently came up with the title Perfectly Punched. I used 4 different punches and the Perfect Polka Dot Embossing Folder, so I think this card will be a good one for that class. The punches that I used are: Boho Blossoms, 1/2" Circle, Itty Bitty Shapes Punch Pack, and the Dotted Scallop Ribbon Border.

Don't forget, if you are a former Stampin' Up! Demonstrator* who left in the past 3 years, during the month of July you can Rejoin for Only $35!

To rejoin Stampin' Up!, former Demonstrators only need to purchase the Rejoin Starter Kit and sign and complete a new Independent Demonstrator Application and Agreement.

The Rejoin Starter Kit Contains:
  • 2010-2011 Idea Book & Catalog (8)
  • 2010 Summer Mini Catalog (8)
  • Guest invitation postcards (100)
  • Customer order forms (50)
  • 2010-2011 Definitely Decorative catalog (1)
  • Celebrando Creatividad (1)
  • Two months free Demonstrator Business Web Services (DBWS) subscription
Demonstrator Application and Agreements must be received by Stampin' Up! by July 31, 2010.

*Only demonstrators who resigned on or before March 31, 2010, are eligible for this offer.

Contact me if you have any questions!

Thanks for checking in!

dd

Wednesday, July 21, 2010

Always

Wow! What happened to this week?

Monday I had a Doctor appointment and it was my Mother-in-Law's Birthday, so we took her to dinner. I have been having some issues with my shoulder, and had an MRI on Tuesday. I picked up my grand daughter later that afternoon and she spent the night Tuesday night, and now Wednesday is almost gone too! Not much time for stamping.

I do however, have another Fancy Folds card to share with you. For this one I used the Always Stamp Set, and Blueberry Crisp DSP. I think they coordinate very well. I used Sahara Sand Cardstock for the base and Pacific Point as an accent. I stamped the bird with Pacific Point, and the berries with Sahara Sand Classic Ink on Very Vanilla Cardstock.
The ribbon is the now retired kraft taffeta. I'm still waiting on some new ribbons!

This card is like two cards folded together, overlapping each other. Here is a picture showing how the fold works.


Thanks for stopping by today. Hope you're having a Great week!

dd