The selling period for the
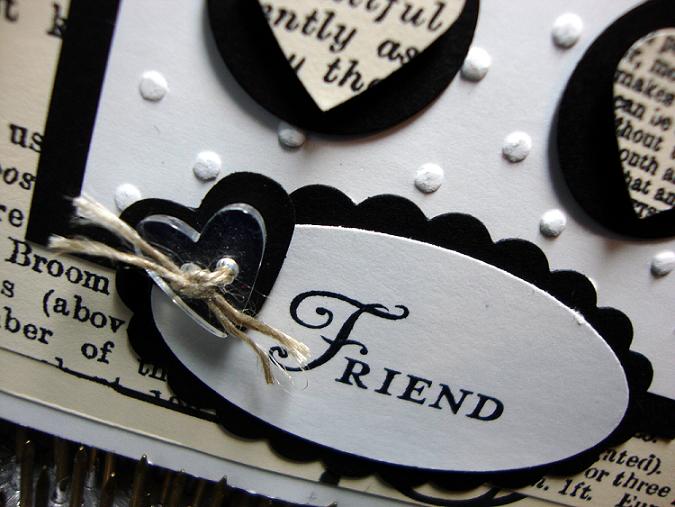
Occasions Mini Catalog has begun! This mini is full of fun new Stamp Sets, Designer Series Paper, Ribbon, Buttons, Tools and more. I finally had some time to try out some of these new products. Here is a Valentine card inspired by the tag featured on page 7 of the mini.

I Love everything about this catalog! I use my
Big Shot in almost every project, so I was extremely happy to see the new
Framelit Dies. These are a bit different from the dies we've had in the past. They are wafer thin dies designed so you can see what you are cutting. The
Heart Collection used here, comes with 6 dies, designed to make layering a breeze! This set coordinates with the
Take it to Heart Stamp Set, also featured in the mini.
Another great new product is the new
Textured Impressions Embossing Folders,
Adorning Accents, used here. These are smaller than the regular embossing folders, designed to add embossing to the edges of your cards. This set comes with 3 folders, that coordinate with the new
Edgelit Dies, and of course, the
Bordering on Romance Stamp Set, so you can stamp, cut & emboss so easily!
One more item I am completely in Love with is the new
3/8" Pleated Satin Ribbon! It is available in 4 colors. I've used the Blushing Bride here. It is gorgeous and so easy to use.
You can view the entire mini by clicking on the picture on the side bar. If you don't have your very own copy, just let me know & I'll get one to you right away! Also,
Sale-a-Bration begins later this month. If you haven't received your brochure, let me know and I'll make sure you have one before it begins on January 24, 2012.
If you're interested in Hosting a workshop,
Sale-a-Bration is a super time to do it! You and your friends can earn Free product with a qualifying purchase. For the first time ever, You as a Hostess has the opportunity to earn an adorable Free Reusable Tote, and a Free Hostess Bundle* featuring exclusive
Sale-a-Bration items.
*Host a $400 WorkshopHave you been thinking about joining the Stampin' Up! family? During
Sale-a-Bration is a great time to do this as well! Not only will the Starter Kit be discounted, you will receive either a Free pack of Designer Series Paper of your choice, or a Digital Download each month for the rest of the year! This is an awesome savings to help you get your business off to a great start. Contact me if you have any questions, I'd be happy to chat with you about this Fun Opportunity, & I'd love to have you on my Team!
Happy New Year!
Thanks for stopping by~
dd
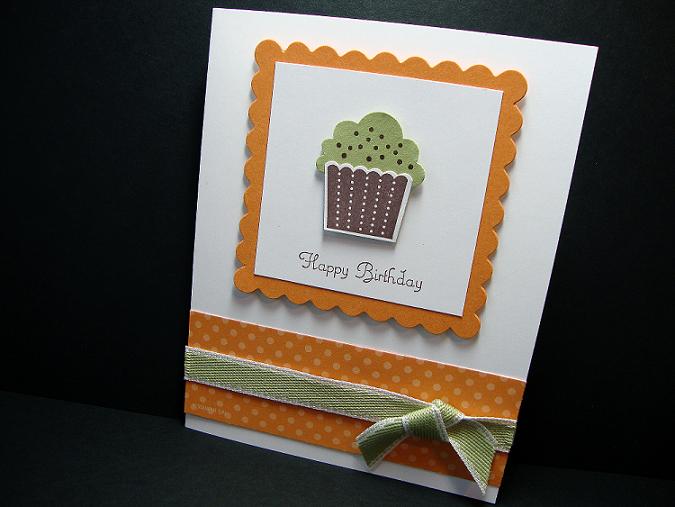
 I stamped the cupcake image twice, once with Basic Grey Classic Ink, and once with Pretty in Pink. I cut out the pink cupcake by hand, and adhered it with Stampin' Dimensionals. I used my Stampin' Write Markers to color the cherry, cut it out and adhered it with a Mini Glue Dot.